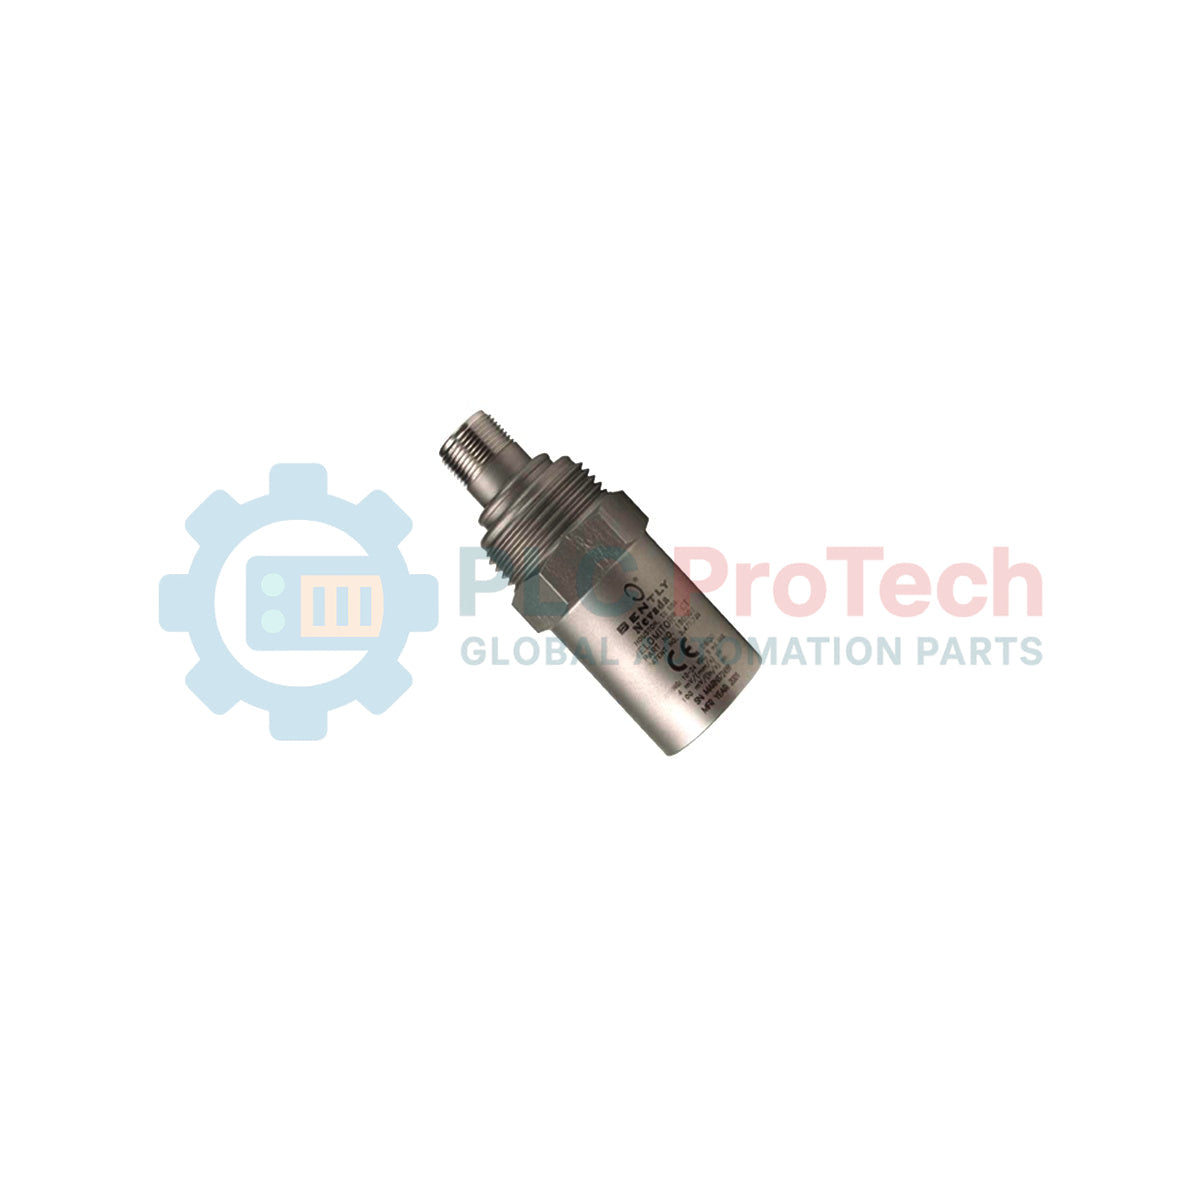
Description
Engineered specifically for low-frequency vibration monitoring on cooling tower fans and slow-speed machinery, the Bently Nevada 190501-12-99-02 Velomitor CT utilizes an internal solid-state accelerometer and integration circuitry to provide a direct velocity output. This specialized sensor is designed to detect early-stage mechanical anomalies in harsh, high-humidity environments, facilitating proactive maintenance before operational failures occur.
By integrating the velocity transduction mechanism directly within the rugged housing, this unit eliminates the signal degradation issues commonly associated with external charge amplifiers. The configuration features a 32-foot integrated cable and a robust M8x1 plate stud mount, providing a ready-to-install solution optimized for wet, demanding industrial structures.
Features
-
Internal Integration: Combines solid-state accelerometer technology with an onboard integrator to produce a low-noise velocity output directly.
-
Extended Cabling (Option -99): Features a factory-terminated, 32-foot (approx. 9.7 meters) integrated cable to minimize field termination failure points.
-
Specialized Mounting (Option -12): Supplied with a heavy-duty Plate Stud 3/8-in 24 to M8x1 for rigid mechanical coupling to the machine casing.
-
Hazardous Area Certified (Option -02): Designed to meet multiple international explosion-proof and hazardous area standards for safe deployment in volatile zones.
-
Corrosion Resistant: Built to withstand continuous high-humidity, corrosive atmospheres typical of cooling tower wet decks.
Applications
- Cooling tower fan gearboxes and driver shafts.
- Induced draft and forced draft ventilation fans.
- Low-speed industrial pumps and compressors.
- Water and wastewater treatment rotating machinery.
Technical Specifications
| Manufacturer |
Bently Nevada |
| Model Series |
190501 Velomitor CT (Cooling Tower) |
| Full Part Number |
190501-12-99-02 |
| Mounting Option (-12) |
Plate Stud 3/8-in 24 to M8x1 |
| Connection Option (-99) |
Integrated 32-foot (9.7m) cable |
| Agency Approval Option (-02) |
Multiple approvals (ATEX, IECEx, Division 2 / Zone 2 compliant) |
| Shipping Weight (Calculated) |
2.0 kg (4.4 lbs) |
Connections and Interfaces
| Wire Color |
Signal Assignment |
Description |
| White |
SIG / PWR (+) |
Positive dynamic signal and loop power input |
| Black |
RET (-) |
Signal return / common ground reference |
| Shield |
SHIELD |
Drain wire connected to shield; terminate at monitor chassis ground |
Empirical Engineering Insights
Alternative Models & Compatibility
The Velomitor CT (190501) features a lower frequency filter profile optimized for low-velocity cooling tower machinery compared to the standard Velomitor (330500). Do not substitute a standard 330500 sensor on a cooling tower fan unless you reconfigure the monitor's low-frequency corner limits in the 3500 rack configuration software, as doing so may cause false alarms or miss critical low-frequency blade-pass energy.
Application Pitfalls & Engineering Notes
While the integrated 32-foot cable (Option -99) provides a seamless seal against moisture ingress at the sensor head, the free end of the cable is vulnerable. Always route this cable through liquid-tight conduit up to a localized junction box. Ensure the localized junction box uses a breather drain to prevent condensation from wicking down the cable sheath and corrupting the high-impedance signal.
Commissioning & Wiring Tips
Always ensure the shield drain wire is isolated and cut back at the transducer end. Ground the shield exclusively at the monitoring system's terminal base (e.g., the 3500/42M monitor input card). Grounding the shield at both ends introduces a ground loop that will inject 50/60 Hz line noise into your dynamic vibration plot, distorting diagnostic spectrum analysis.
Installation Guidelines
CRITICAL WARNING: De-energize and lock out all power sources driving the cooling tower fan motor before entering the plenum. Confirm that the fan blade assembly has completely ceased rotation and is physically locked to prevent windmilling before attempting installation.
1
Prepare the mounting surface on the gearbox casing. It must be machined flat to a surface finish of 0.8 micrometers (32 microinches) minimum to ensure complete mechanical coupling.
2
Apply a light, uniform coating of silicone grease or acoustic coupling fluid to the mating surface of the plate stud before threading.
3
Thread the plate stud into the casing and torque the transducer body to the recommended OEM specification (typically 4.5 to 6.8 Nm) using a calibrated torque wrench. Do not use pipe wrenches or slip-joint pliers on the hex flats.
4
Secure the integrated cable using non-conductive, UV-stabilized cable ties. Ensure there is a small loop of slack near the sensor housing to decouple mechanical stress caused by structural movement.