Description
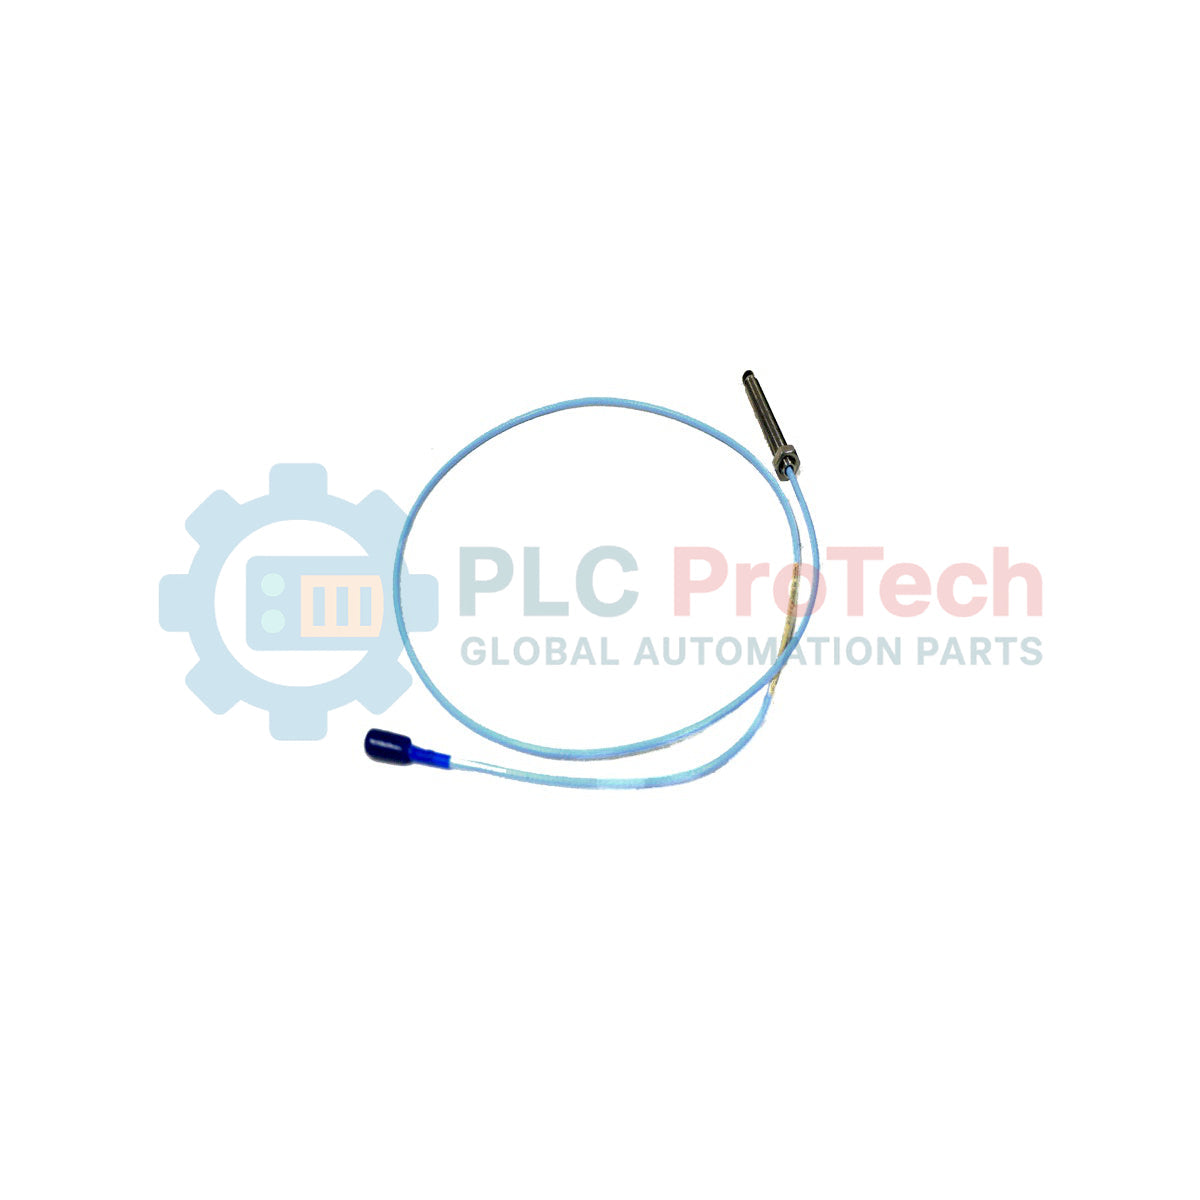
To perform highly accurate displacement and vibration measurements, the industrial-grade Bently Nevada 330101-00-36-10-02-00 proximity probe utilizes eddy current technology for continuous machinery monitoring. Designed as a cornerstone component of the 3300 XL 8 mm Transducer System, this non-contacting sensor measures static and dynamic distances between the probe tip and the observed target, typically a rotating shaft. The physical configuration features an unthreaded length of 0.0 inches, an overall case length of 3.6 inches, a total physical length of 1.0 meter, and standard non-armored cable terminating in a miniature coaxial ClickLoc connector. Engineered to survive harsh, high-temperature machinery cases, this probe provides exceptional stability and linearity in demanding industrial environments.
Features
-
Unshielded 8 mm Tip: Offers optimal magnetic field distribution for high-resolution eddy current sensing.
-
ClickLoc Coaxial Connector: Features a moisture-resistant, robust mechanical locking system that prevents accidental disconnection.
-
Thread-Free Probe Body Nose: Configured with a 0.0-inch unthreaded section to facilitate precise positioning in specialized mounting brackets.
-
Rugged Cable Construction: High-performance standard coaxial cable suited for long-term vibration endurance inside generator and compressor casings.
Applications
- Radial shaft vibration and position monitoring in steam and gas turbines.
- Thrust position measurements within high-pressure centrifugal compressors.
- Eccentricity and phase reference (Keyphasor) tracking on critical rotating machinery.
- Casing expansion and rotor-to-stator differential expansion detection.
Technical Specifications
| Parameter |
Value |
| Manufacturer |
Bently Nevada |
| Model Part Number |
330101-00-36-10-02-00 |
| System Type |
3300 XL 8 mm Proximity Transducer System |
| Thread Size |
3/8-24 UNF (English threads) |
| Unthreaded Length Option |
0.0 inches |
| Overall Case Length Option |
3.6 inches |
| Total Length Option |
1.0 meter (3.3 feet) |
| Connector and Cable Type |
Miniature coaxial ClickLoc connector, standard cable |
| Agency Approvals |
Not Required (Option 00) |
| Operating Temperature Range |
-51 to +177 degC |
| Linear Range |
2.0 mm (80 mils) typical |
| Nominal Scale Factor |
7.87 V/mm (200 mV/mil) |
| Country of Origin |
United States |
| Shipping Weight (Calculated) |
0.15 kg |
| Packaging Dimensions (Calculated) |
200 x 150 x 50 mm |
Connections and Interfaces
| Connector Element |
Function / Circuit Assignment |
| Center Pin |
High-frequency RF signal path (connects to Proximitor Sensor) |
| Outer Coaxial Ring |
Return path and shield (common ground reference) |
Empirical Engineering Insights
Alternative Models & Compatibility
This 3300 XL probe is fully backwards compatible with standard (non-XL) 3300 8 mm Proximitor Sensors and extension cables. However, when mixing non-XL components with the 3300 XL line, the overall system accuracy defaults to the non-XL performance specifications. Always match the total mechanical length (this 1.0-meter probe combined with a 4.0-meter or 8.0-meter extension cable) to match the calibrated length configuration of your 5.0-meter or 9.0-meter Proximitor Sensor.
Application Pitfalls & Engineering Notes
Avoid route bends of the coaxial cable with a radius of less than 25.4 mm (1.0 inch) to prevent physical impedance changes in the cable, which directly manifest as calibration and measurement drift. Because this model does not have fluid leakage armor (Option 00 for unthreaded length and standard outer jacket), it must be routed inside a protective conduit or dedicated internal channels if exposed to heavy mechanical abrasion or highly corrosive chemicals inside the machinery housing.
Commissioning & Wiring Tips
During commissioning, keep the miniature ClickLoc connector interfaces completely clean and dry. Use a dedicated contact cleaner if contamination occurs. When tightening the ClickLoc connectors, finger-tighten past the initial resistance click; do not use pliers. To isolate the connector from machine case grounds, slide silicone connector protectors over the junction point and apply self-fusing insulation tape.
Installation Guidelines
CRITICAL WARNING
Verify the machinery is fully shut down and safely isolated under lockout/tagout procedures before inserting or adjusting proximity probes. Moving machine components can cause catastrophic hardware damage and severe physical injury if the probe comes into direct contact with a rotating shaft during setup.
1
Calculate the desired physical penetration depth by measuring from the mounting bracket to the shaft target surface.
2
Thread the probe body into the mount, carefully observing resistance. Stop immediately if any binding occurs to prevent cross-threading the fine 3/8-24 threads.
3
Connect the probe to a calibrated Proximitor sensor and monitor the DC voltage gap output while rotating the probe body to reach the nominal mechanical gap voltage (typically -10.0 VDC for the center of the linear range).
4
Lock the probe in place using a standard locknut, applying the specified torque limit to prevent collapsing the probe's internal tube assembly.