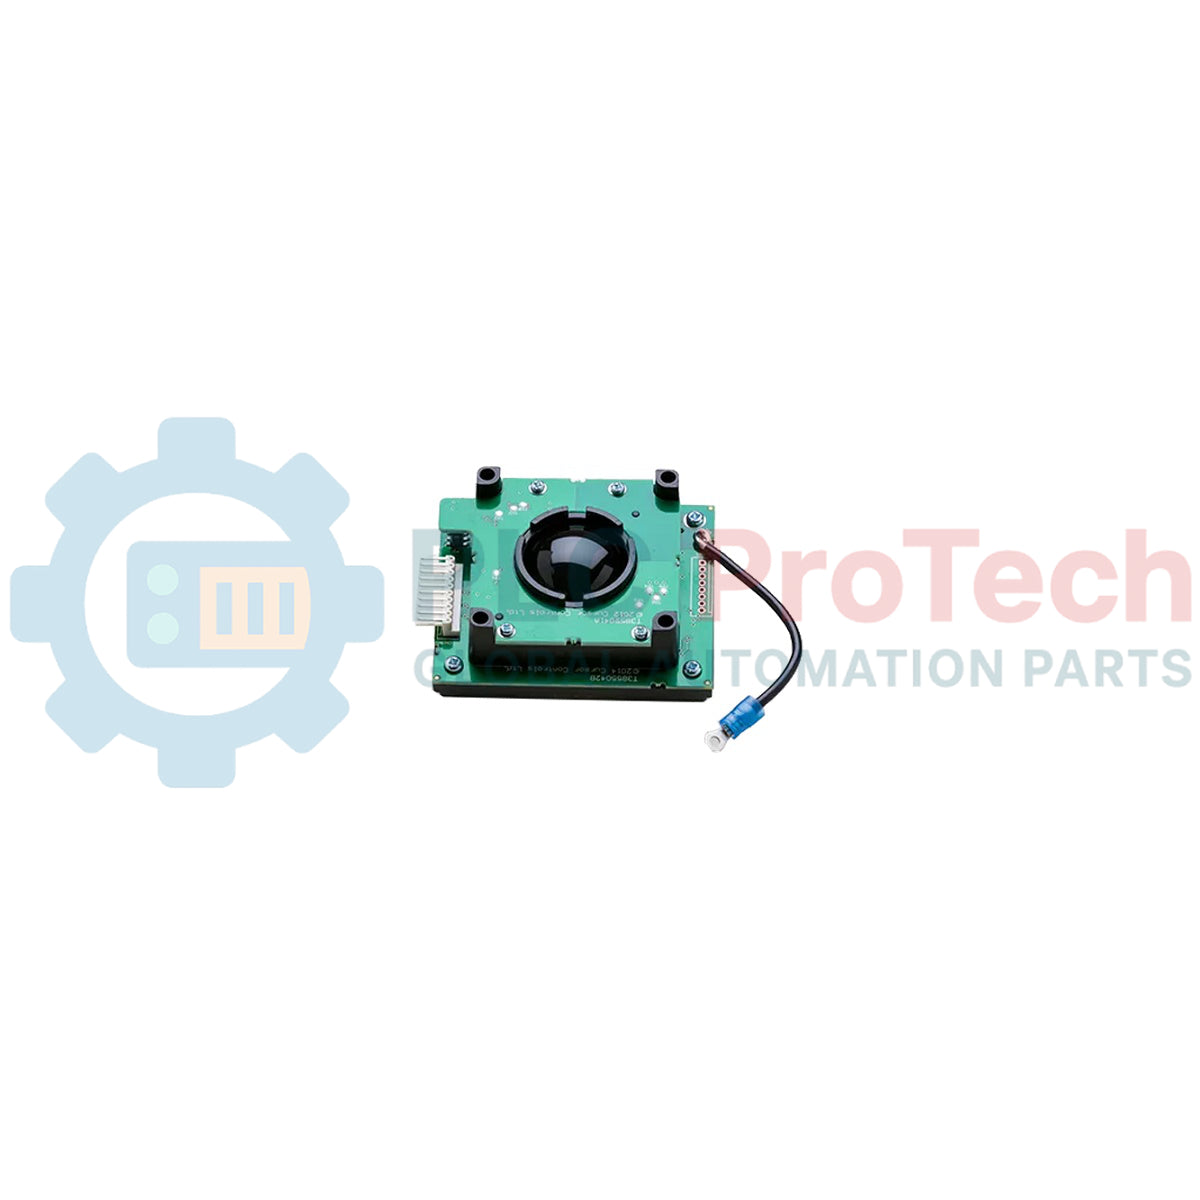
Description
Serving as a robust industrial pointing device, the Honeywell 51196694-901 is engineered specifically for seamless integration within Honeywell operator consoles, including TDC 3000 and Experion DCS human-machine interfaces (HMI). This heavy-duty console trackball assembly ensures precise cursor navigation and long-term mechanical reliability in demanding control room environments. Designed to endure continuous operator inputs, it serves as a direct-fit replacement part for degraded or non-responsive pointing devices on operator keyboard panels.
Features
-
Industrial-Grade Optics: Delivers high-precision tracking and smooth cursor response across high-resolution DCS monitor configurations.
-
Durable Mechanics: Built to withstand constant physical use, resisting wear from dust, debris, and tactile oils.
-
Direct Drop-In Replacement: Designed to fit standard cutout profiles within legacy Honeywell operator consoles without mechanical modification.
-
Plug-and-Play Integration: Plugs directly into existing console keyboard controller cards for instantaneous system recognition.
Applications
- Honeywell TDC 3000 Universal Stations (US) and Global User Stations (GUS).
- Experion PKS Industrial Console Keyboard Assemblies.
- Refinery, chemical processing, and power plant control room operations panels.
Technical Specifications
| Parameter |
Value / Specification |
| Manufacturer |
Honeywell |
| Model Number |
51196694-901 |
| Device Type |
Industrial Console Trackball Assembly |
| Compatible Console Systems |
TDC 3000, Experion GUS/US operator keyboards |
| Interface Connection |
Internal console keyboard interface ribbon/cable connector |
| Shipping Weight (Calculated) |
1.0 kg |
| Package Dimensions (Calculated) |
180 mm x 180 mm x 120 mm |
Empirical Engineering Insights
Alternative Models & Compatibility
The 51196694-901 is widely backward-compatible with legacy keyboard control boards. Always verify your specific console sub-panel revision, as some older TDC 3000 systems may require an adapter harness or firmware alignment on the keyboard controller if switching from legacy optomechanical ball-and-shaft assemblies to this optical variant.
Application Pitfalls & Engineering Notes
While the internal optical sensors are highly resistant to standard control room particulates, continuous exposure to grease, oils, and moisture can film the internal rollers or optics, causing cursor drift or intermittent loss of axis movement. Avoid using harsh chemical sprays or solvent cleaners directly on the tracking sphere; instead, extract the ball and clean the internal support bearings using dry compressed air and a clean, lint-free microfiber cloth.
Commissioning & Wiring Tips
Ensure the keyboard assembly is completely powered down before connecting the trackball. Connecting or disconnecting the trackball cable while the keyboard controller card is energized (hot-plugging) can damage the sensitive ESD-protection components on the interface card, potentially leading to communication failures on the Honeywell I/O link.
Installation Guidelines
CRITICAL WARNING: De-energize and disconnect the operator keyboard assembly from the console host power source before initiating any mechanical disassembly or component swaps. Failure to isolate power may result in damage to internal logic circuits or electrostatic discharge (ESD) failures on the console keyboard controller board.
1
Unfasten and carefully lift the keyboard assembly cover plate from the console deck to access the underside of the unit.
2
Carefully disconnect the existing trackball's interface cable connector from the keyboard controller board, noting the keyway alignment and wire pathing.
3
Remove the retaining mounting nuts/screws holding the legacy trackball assembly to the keyboard faceplate, then lift the unit clear of the panel cutout.
4
Position the new 51196694-901 trackball into the cutout, secure it firmly with the retaining hardware, and carefully seat the communication cable into its designated port on the keyboard controller.